Single-Handed Sword Build
So, you wish to learn how to smith foam, hm? Good! I am Bain of Rogin, and I have written this page as a guide to walk you step-by-step through building your first Dagorhir single-handed (blue) sword. In Dagorhir, we color code our weapons for the type of "damage" they deal: one handed weapons are blue, thrusting and stabbing weapons and tips are green, projectiles are yellow, two-handed weapons are red. Ask any officer for additional colors and damage, or if you have any questions. This tutorial will teach you how to build a blue/green sword. Keep in mind, this is written with directional references (images to the left or right) and was designed to be viewed from a computer. If you are viewing this on your phone and the description or image doesn't make sense, ask a foam-smith for help, or view this page on a computer.
This is an inexpensive build made of a camping bedroll (blue foam), Marine foam (yoga mat or stadium seating), and a PVC core. You will need the following tools: A ruler, sharpie permanent marker, razor blade, scissors, strapping tape, carpet tape, hockey tape, a driveway marker (optional), a saw capable of cutting fiberglass (for the driveway marker), a penny, a can of DAP adhesive, a package of lady's trouser socks (for a simple cover), blue electrical tape, and green electrical tape. As you gain experience, higher quality foams and cores can be used. This tutorial is designed for a new player, to get them up and running for the first practice or event.
This is an inexpensive build made of a camping bedroll (blue foam), Marine foam (yoga mat or stadium seating), and a PVC core. You will need the following tools: A ruler, sharpie permanent marker, razor blade, scissors, strapping tape, carpet tape, hockey tape, a driveway marker (optional), a saw capable of cutting fiberglass (for the driveway marker), a penny, a can of DAP adhesive, a package of lady's trouser socks (for a simple cover), blue electrical tape, and green electrical tape. As you gain experience, higher quality foams and cores can be used. This tutorial is designed for a new player, to get them up and running for the first practice or event.
|
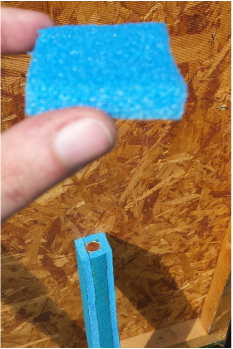
The first step to building your sword is to mark a piece the width and length of your blade. This style of build is called a box-and-blade build. Don't forget to leave room for the pommel (butt of the sword) and your hand grip. You will need two such pieces. If you're not sure, trace it!

|

Once you have cut out the two pieces, open your can of Dap, and coat two sides of the core with dap, and one side of each of the foam pieces you've just cut out. I know you're thinking "But, Bain, I don't want to get one of my brushes all full of this stuff! It's glue!" I understand this issue. The solution is easy, pick a corner of the foam you haven't used yet, and cut a piece big enough that you feel comfortable using as a brush. You already have the foam, so you don't have to worry if you loose this brush.
|
|
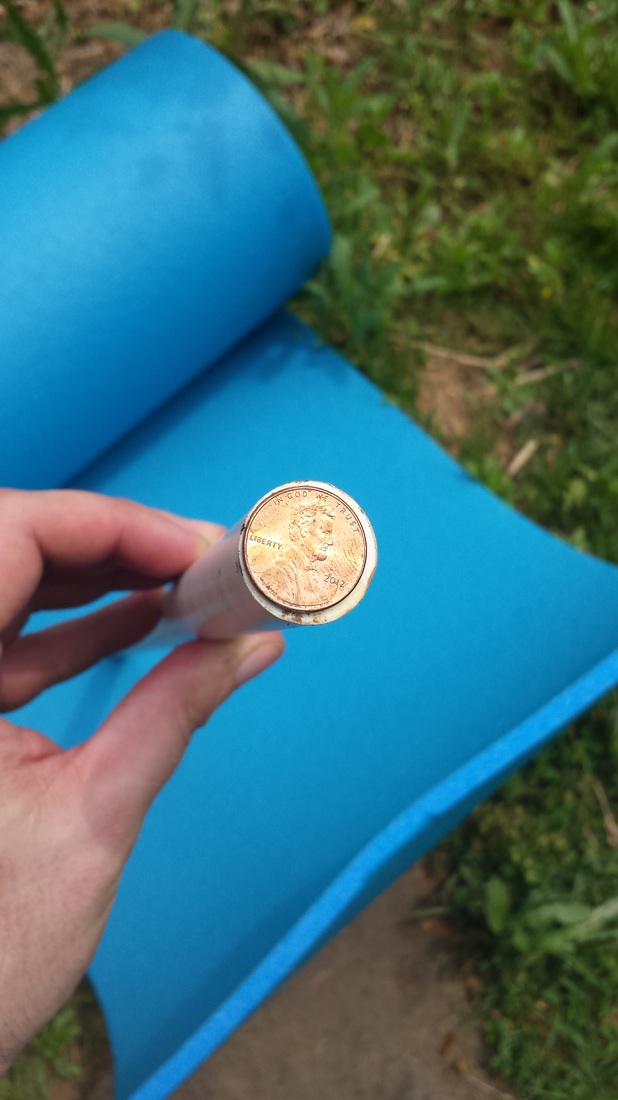
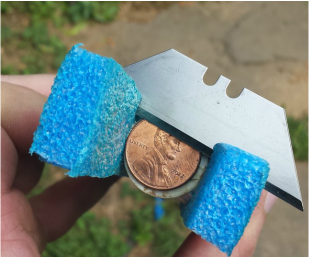
Wait until the Dap on all surfaces is fairly tacky to a light touch, then carefully align the pieces to the spots on the core where you just coated in Dap. Feel free to attach the penny to the newly-designated Top of the blade at this time. Use hockey tape or strapping tape to secure it.
If the foam is extending beyond the penny cap of your sword, once the Dap has dried for a while (time varies on weather, humidity and what not), feel free to use your razor blade to cut the excess off of the top. Feel free to use the penny as a guide plane!

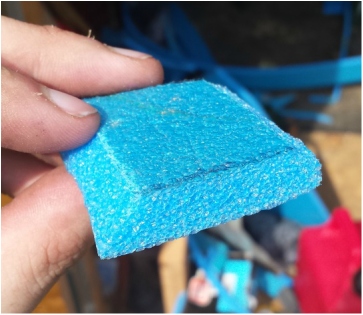
Ok, good, now we have a box around the core. It doesn't look like much yet, but things are shaping up fast! The next step is to make a cap for the top of the sword box. The cap helps protect the blade of the sword from the core, and lessens the likelihood of a tip blow-out. Again, if this is your first sword, you can trace the square top of your box for a more accurate fit. In the image to the right, the area where the blade will go is facing towards you. This gives the box a good, secure hold, and the right angles strengthens the box more than attaching the blade on the wider strips of foam.
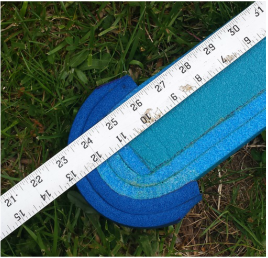
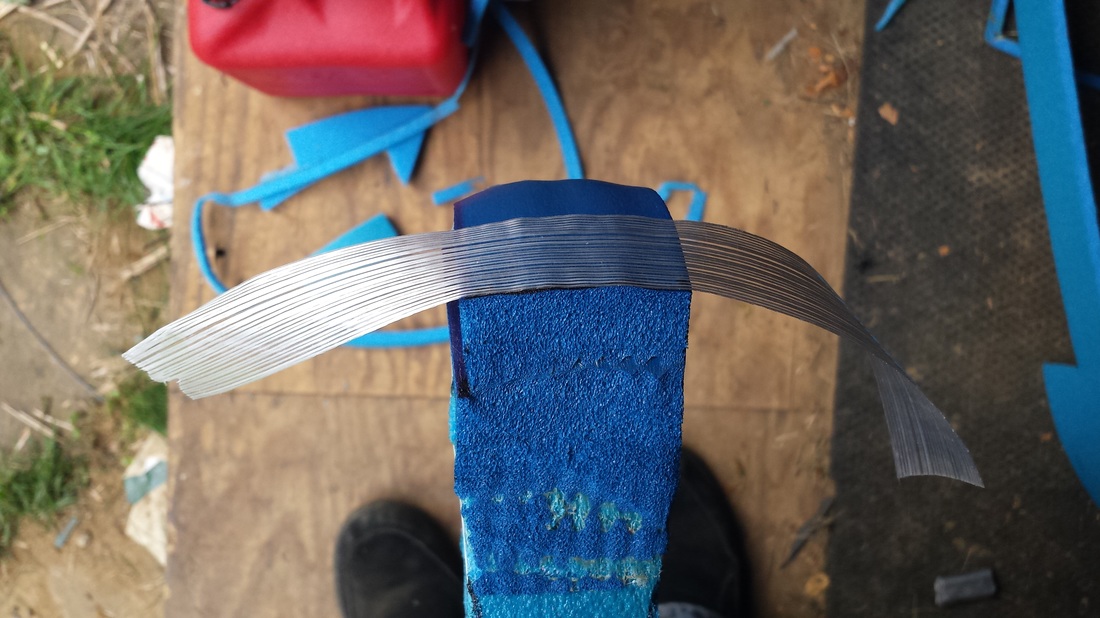
Blade time! This will be the first wrap of your blade! Measure the total width of your box, and the length of your entire sword, including over the beveled cap on top. Cut out what you've just measured, and repeat the Dap process, again on the box, and on one side of the blade piece. don't worry if it extends out a bit farther when it's on, you can cut the excess off a little later. Once the Dap is tacky, start from the bottom (handle side) of the box, and wrap it around the sword. This step defines the striking edges of your sword.
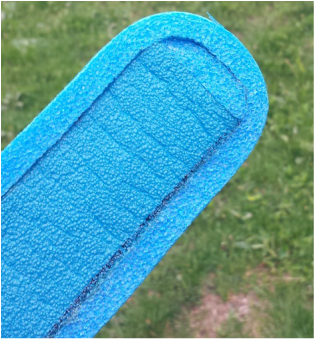
Once the first wrap of your blade has dried (you can't peel it apart) it's time to repeat the last step, and make a second wrap around your sword, defining the true edge of your blade! Again, if there is some overhang, don't sweat it. The extra can always be cut off once the Dap has dried. When you're done attaching the second half, the sword should look like the one on the right.
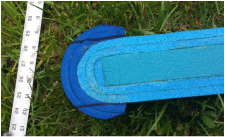
Use a ruler to mark the edge of your striking blade on your stabbing tip. This step will help us cut away the excess foam, and streamline your stabbing tip, as well as make your sword look cleaner. The images to the right should be the end result.
Here is where that razor blade comes in to play again. Take your time with this. Start at the top, where you've made your marks and slowly cut the marine foam away, peeling the excess back as you go. It's ok if this isn't the cleanest cut on your sword. It takes practice to get his right. Upon completion of this, your stabbing tip should look like the one to the right.
After the strip is attached in the previous step, pull the sides down gently at an angle to the flat of your blade. This step is to help prevent your tip from moving too much during use. When done, it should look like the picture to the right. If it looks like this, do it again for the other edge of the stabbing tip.
Here is another step where I deviate from most other swords. I tend to oblong my handles. The reason for this is to help prevent you from striking someone with the flat of your blade. A flat hit doesn't count.
Take your carpet tape, and lay a strip down the handle, facing one of your blades. This will help give us a base to work with, and minimize movement of the driveway marker pieces during the building process. 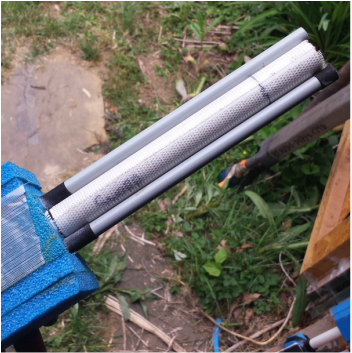
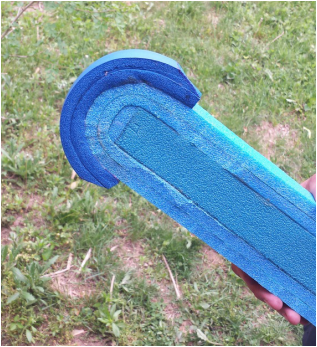
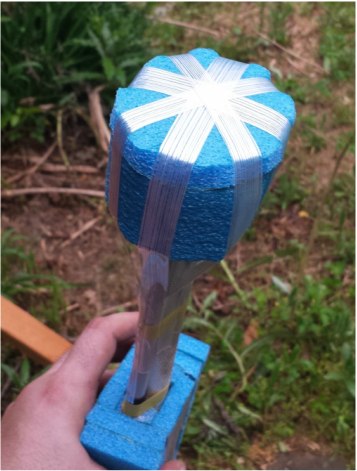
Now it's time to move on to the pommel of your sword. The pommel should be 1.5" on the core. If you find your driveway marker pieces are moving around too much, feel free to secure them with a little bit of electrical tape. The pommel is easy compared to the rest of the blade. This particular sword has an oval pommel because it encompasses the two pieces of driveway marker used to oblong the handle. Cut a piece the same width as your finished blade, and Dap it to the bottom of your handle. When that's dry and attached, attach a cap to the top of this. This cap will form a layer of protection, and dimension for the second wrap layer. You can either tier your pommel, or measure the whole thing, including the cap, and make a wide pommel. For this build, I chose the latter. So, simply replicate the previous steps; wrap around your first layer, and cap the new second layer. When you're finished with the second layer, your pommel should look similar to the one on the right.
Now, I can hear you asking "Bain, why four pieces? I only used two!" This is true. The other two pieces come in to play now. Make another plus (or a star if you'd like) over the current plus, in the void spaces to the diagonal. It should look like the image to your right when you're done.
Hey, this is starting to look like a sword now! But, let's face it; this sword isn't exactly comfortable to hold. Well, break out the carpet tape and the rope, it's time to get a grip, or in this case, make one!
Cut a strip of carpet tape to go along the flat of your blade from the base to your pommel. This is simply going to help us hold the rope in place while we wrap it. Other people use tennis grip, or a more expensive material, but I find an old wash line works just as well. 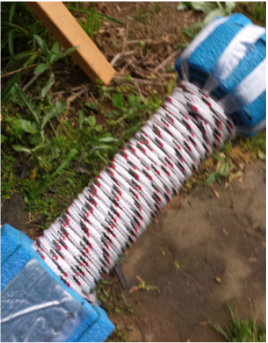
Now your sword is looking like a sword! Time to work on covering it, starting with the pommel! 
The finished pommel should look like the one on the right. nice, clean, and tight. I finished wrapping the handle after this image was take. Ok, cool, now we are in the home stretch! 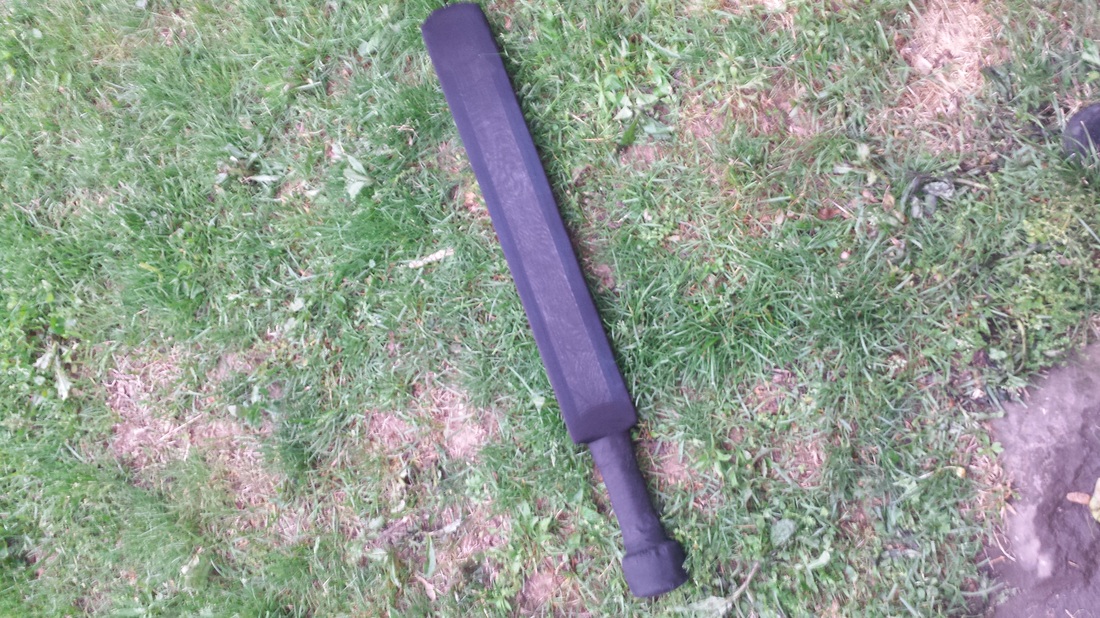
Finally, the finishing touches! I tend to mark my weapon colors on the flat of the pommel. If you've added a stabbing tip like this guide showed you, you now have a blue/green sword, so use blue and green electrical tape. Want something more personalized? Used colored sharpies to make a mark on the bottom of your pommel, or the flats of your blade to show that the weapon is yours, and to help identify it at checks. I use a silver sharpie to mark the pommels with the Rogin emblem as an identifier.
|
Your blade should look like the one on the left at this point. Don't worry if your foam extends past your penny at this point. The open-celled foam has a tendency to stretch a bit during the building process. When I glue, i tend to start from the top of the grip and work my way up, that way, the starting points are even.
Ok, Next, measure the new total width from the outside edge of one piece of foam to the other. This measurement is the new width of the next two parts of the box at the center of this sword. Once the pieces are cut out, Dap the core, sides of the foam, and the newly cut pieces. Once you have let the Dap become tacky, glue them together. These new pieces are the longer ones in the picture at left. After the whole thing has dried, again use the razor for a clean cut across the top.
This is an instance where I tend to differ from some of my fellow foam-smiths. I tend to bevel the edges of my box. This process is quick and painless either with a pair of scissors, or a gentle use of the razor blade again. The beveling allows the blade of the sword to curve more readily around the box, giving you a smoother edge, and saves you some headaches when you're trying to bend your blade around the box.
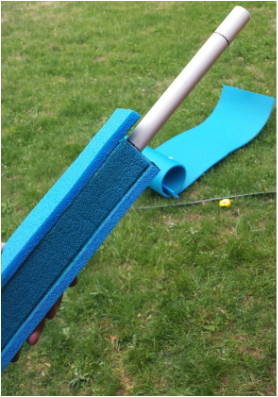
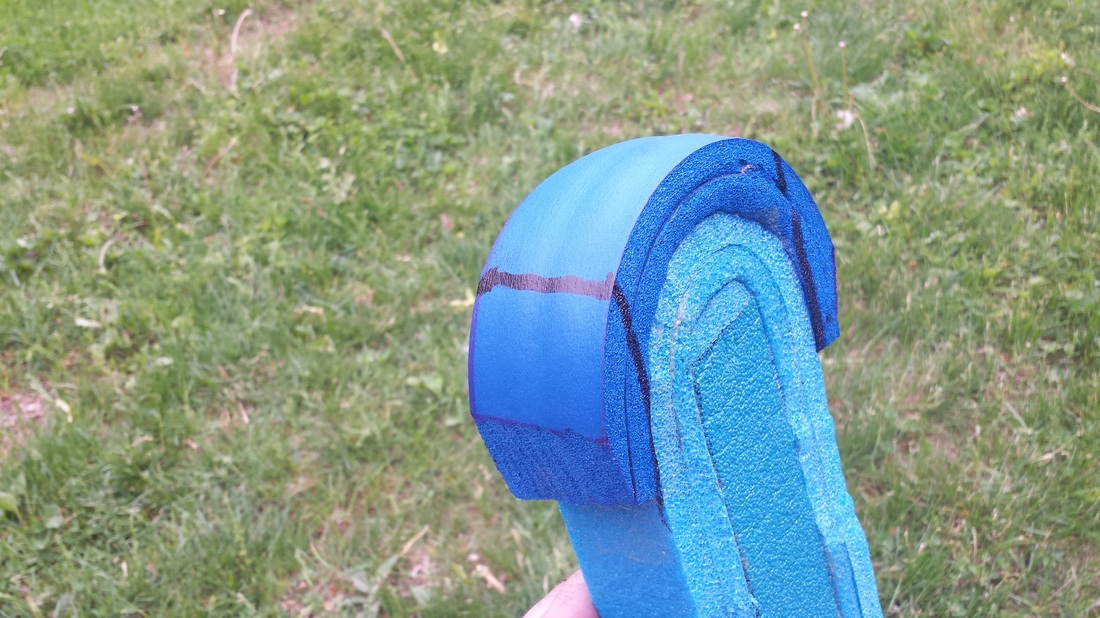
It's this step were the bevel of the box cap comes into play. as you wrap your blade around your box, the bevels help ease the curve on the tip of your sword. The picture to the left is what the top of your sword should look like at this time. Again, give your Dap plenty of time to dry. The wider part of your box is now the "flat" part of your sword! (The flat is NOT a striking surface! Edges only!)
Here is where the Marine foam comes into play; stabbing tips. I tend to make my swords with stabbing tips to allow that quick exposed shot to pay off. In this instance I used an old ribbed yoga mat for the tip. measure from about two inches below the cap of your box around the tip of the blade to get the length measurement. Cut out two of these pieces and glue them together (I glued mine rib side to rib side). Once the two pieces have dried together, Dap one side to the tip of your blade. Yours may look a bit more square, as this particular piece was salvaged from a previous project.
Once you are done marking both sides of your stabbing tip, flip it over and mark the other side as well. Once both sides are marked, connect the lines across the top of the stabbing tip. This will give us guide lines for cutting a cleaner tip.

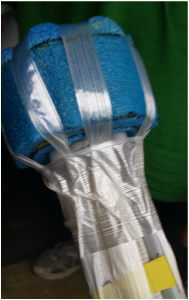
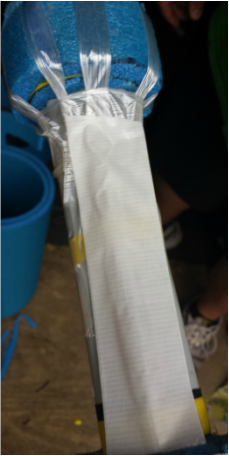
Now comes a much- needed step: Secure the stabbing tip! Your strapping tape roll is fairly wide, so, stretch out about a foot and a half, and make a small cut in the center of an edge. You can use this small cut to pull the strip in half! once you have a piece, place the center on your stabbing tip, like the picture to the left.

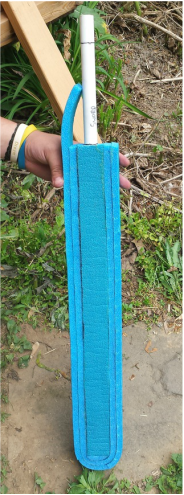
Looks good so far. Now, let's secure the whole stabbing tip. Starting on the flat of your sword at the grip, take a full-width piece of strapping tape up and around your whole sword. This, along with the two securing strips you just did, helps prevent your stabbing tip from "taco-ing" when you use it, or it's at weapons check. If we've don it correctly, your sword is looking like the one to the left. And, yes, in that picture you can see one of my works in progress, and a completed sword, in a sewn silver cover. I mention this, because your sword is quickly looking like that finished product! We just have a little more to go.
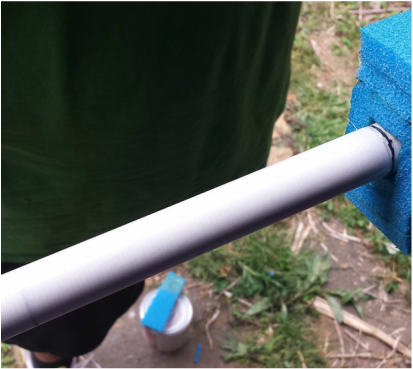
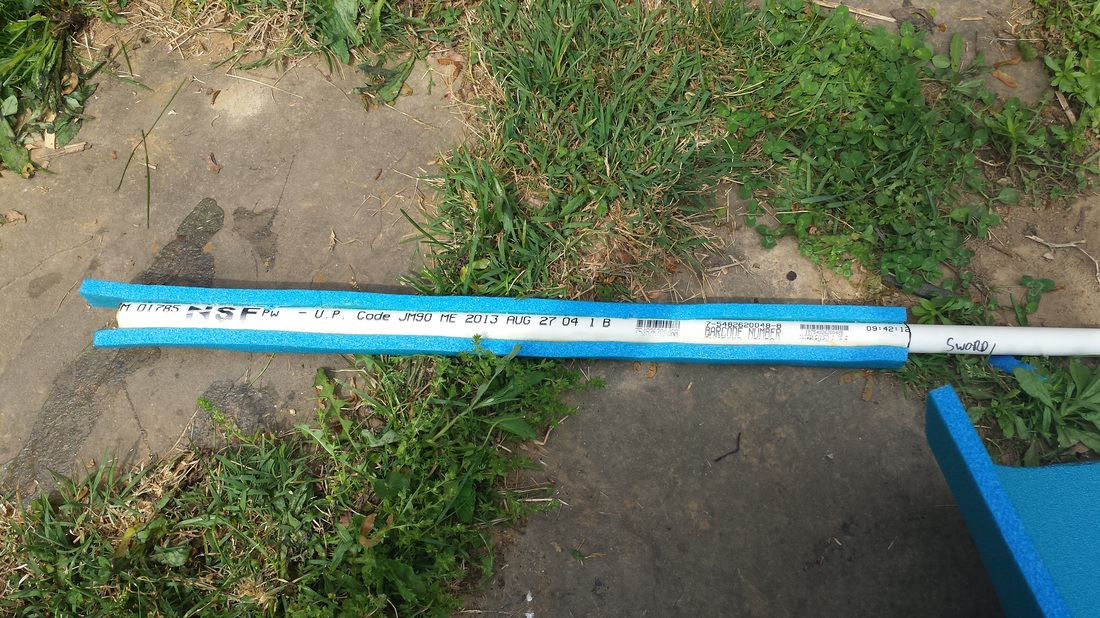
Use a sharpie to mark the legnth of your handle on the driveway marker. To help prevent splinters as you cut, use a bit of the hockey tape over this mark (center of your mark, and re-mark with a silver sharpie if you like) while you cut. No one likes fiberglass splinters. once you have two pieces cut, use the carpet tape strips you placed on your grip to help hold the rods in place. They should look like the picture on the left.

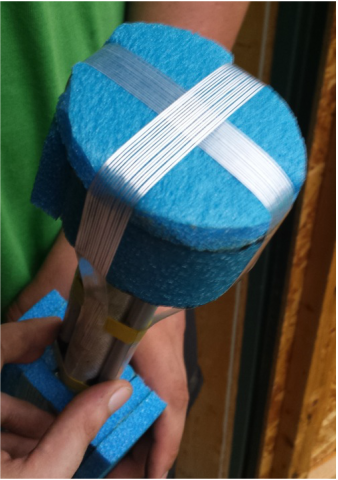
Now, it's time to secure the pommel. After all, you don't want it to come off during weapons check, or on the field! Take your strapping tape and divide the width into four sections, more than long enough to strap down to your grip. I tend to do the full length for security. Place them in a Plus pattern: one going from the flat side to the other flat side, and the other piece going from blade to blade. When the strapping tape is on, it should look like the picture to the left.
Now, here's where things can look a bit ugly. All those long strips on your handle? Secure them with more strapping tape! Securing this down helps prevent the pommel from wobbling around, and will keep your pommel from coming off of your sword. If things are looking like the picture on the left, you're doing it properly. If not... check with someone who has made swords before, and they will help you fix whatever has gone awry.
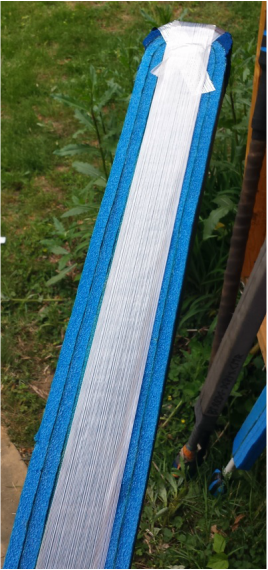
This step is rather simple. I tend to use a clove hitch to secure the rope and start my wrap, but, that's just my style. Simply peel away the protective strip and start wrapping. When completed, your sword should look like the image to the left. 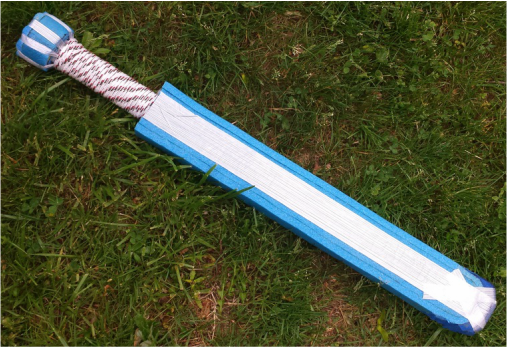
Do you recall how you did the strapping tape on your pommel? If you did, simply repeat the same steps, but use your hockey tape this time. If you didn't, look back in the guide. The image at the left shows the start of the hockey tape. If you see gaps on the sides of the pommel, or you want to look a bit cleaner, feel free to use more hockey tape around the sides to clean it up. After you're done with the pommel, go ahead and wrap the handle. 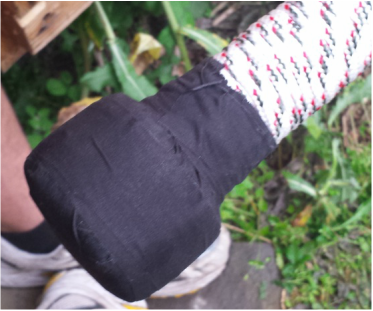
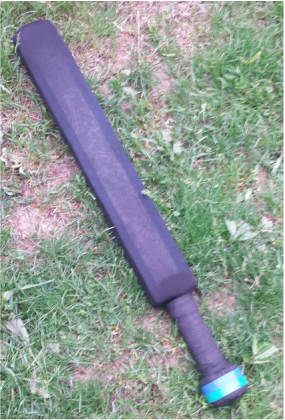
I'll bet you're wondering why I suggested the lady's trouser socks. Well, here's your answer: quick and easy cover. All weapons must be cloth covered in Dagorhir, so three socks (if they are a bit shear) will do the trick. Just roll them down over the blade. When you're done, secure them with Hockey tape. It should look like a sword now! If you can sew, go ahead and make a better cover if you would like. If not, this will do for a few battles.
|