Spear
You find yourself separated from your unit. The other army is advancing on your position. all you can see are tower shields and swords. Your enemy is well trained, and you, unfortunately, are out numbered. The ground under your feat begins to quake with the advance of their army. But, your allies have come to your aid! An entire wall of spears marches up twords your side. "You! Grab a spear!" one of them shouts to you, inviting you to join in their ranks. Hm? You don't have a spear? Let's fix this, shall we?
In this tutorial, you will learn how to build a basic 8' spear. Again, this build is for moderate foam-smiths with a modest budget, and uses blue foam as the primary material. The tools and materials are as follows: Yard stick or ruler, scissors, razor blade or box cutter, strapping tape, clear packing tape, Dap contact cement, blue foam, open-cell foam, a sharpie marker, and hockey tape.
In this tutorial, you will learn how to build a basic 8' spear. Again, this build is for moderate foam-smiths with a modest budget, and uses blue foam as the primary material. The tools and materials are as follows: Yard stick or ruler, scissors, razor blade or box cutter, strapping tape, clear packing tape, Dap contact cement, blue foam, open-cell foam, a sharpie marker, and hockey tape.
|
First, we begin with the core. In this case, I used a Bandshoppe Pole of 8'. A spear needs only 1/3 of its length padded, as it is a stabbing only (green) weapon. Start by measuring your core, and measure out one third of your total length. This build can work on 6', 8', or 10' spears. After the area has been measured and marked, you can Dap the entire marked surface. This will become the top of your spear. 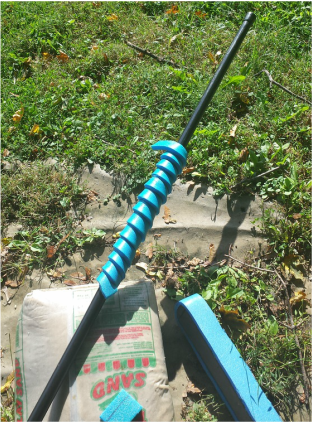
No matter how wide you make your strips, in all likelihood, they won't be long enough. Don't worry about this at the moment, just keep adding more. When you are finished with the first layer, cap the tip. Two layers of padding are recommended, and as your primary layer gets closer to the top, you can have the sides of the strips meet. You can add the second layer with the sides of the foam strips meeting, as seen in the picture to the right. 
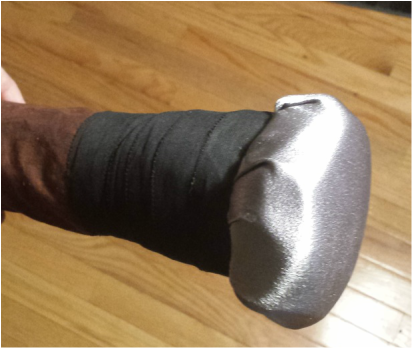
After the second cap is on, next comes a wrap. This helps create a base for the head of the spear. This is a simple wrap of foam around the upper cap, extending down at least 6". This adds stability to the top of the weapon, and helps prevent the spear head itself from shearing off. When finished with the wrap, cap it again. 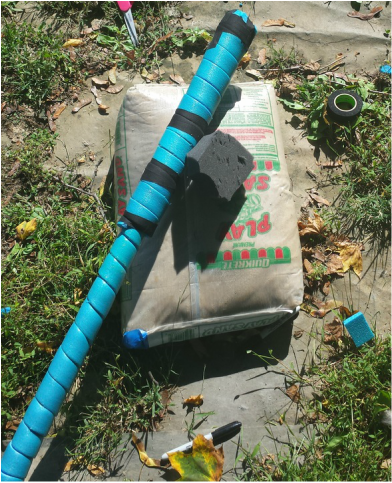
I know you're looking at the picture and thinking. "Hey, wait a sec... Bain, you can't use a wooden core for this build!" You're right, we can't. I've added an extra layer onto the core; wood laminate. As you can see, the thing can almost disappear into my floor. This is something I do personally. After the laminate, I cover the shaft in clear packing tape, to help preserve the wood grain look. To me, it's a touch of something different. Most fighters keep their core barren, or rope wrap the grip. This is simply what I do. 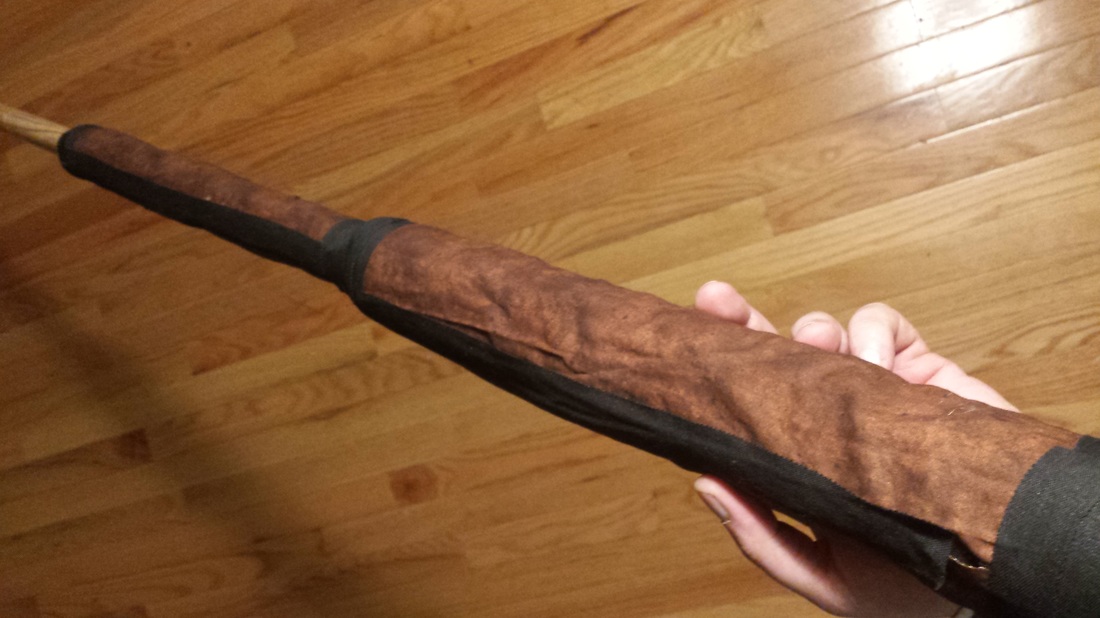
Now that your spear is covered, use some spray- adhesive to attach the open cell foam to the top of your spear. This is where the Duck Tape comes in handy. Once your spear head is mounted and secured, time to cover it. 
|
This is where the build differs immediately from my other builds. This method is the spiral-wrap method. For a tighter spiral, cut the foam thinner. In this build, I chose 1.5" for a close, tight spiral. You can make your spirals as wide as you wish. After your strips are cut out, Dap it, and begin to overlay about 1/8 inch onto the previous layer. This will allow the foam to have other foam to adhere to, in lieu of just the plain core.
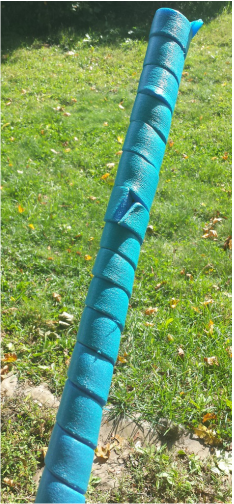
When joining two sections, you can use hockey tape to secure the ends of the wraps together, as this will prevent "fly away" pieces, and help create a more clean spiral overall to your spear. After you are finished with the second wrap, cap the tip again, much as with any other weapon. Since these are stabbing only, this is important, as no one wants to take a core to the gut. 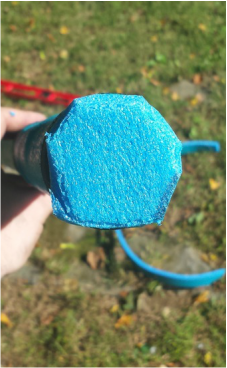
At left, we see the spear with the second layer of foam, just before the wrap step. We also have the beginning of the open-cell spear head. I tend to make my spear heads just like my arrow heads. Keep in mind, this can't pass through a 2.5" hole, so make sure your spear tip is big enough to start with! 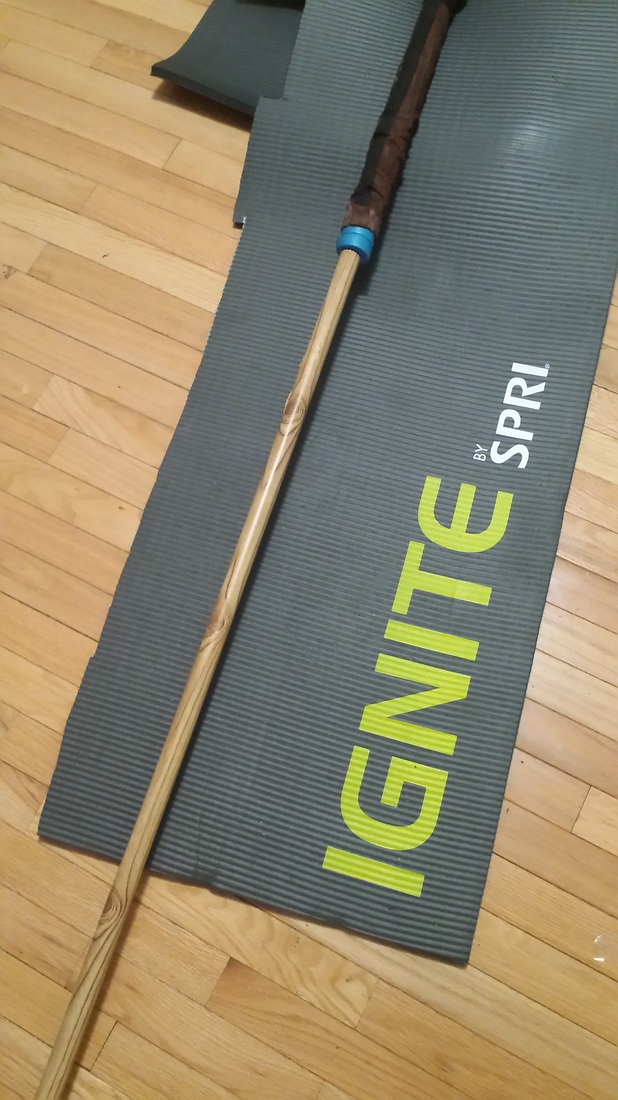
Here's another step that varies from most builds. Now is a good time to add your cover, before you build your pommel. The cloth cover is sewn, and should fit snugly over the foam. I recommend making the cloth cover in three stages; one for the couch, one for the double-padded section, and one for the final set of courtesy padding.
So, your spear head is on, the padding is covered, and your grip is ready. Just simply build a pommel, like the one shown in the single-handed sword tutorial, and your spear is complete. As you can see, Furen loves that spear, and adds a headband from each event onto his spear for decoration.
|
Congratulations! Your spear is complete! Go forth, Keep your friends close, but your enemies at the business end of your spear! See you on the field!
Brita-speak Concise Step-by-Step
1. Measure out the sections of your core (1/3 of the core's length from the tip, 2-3" for the pommel) and mark. Sand the marked-off sections to allow for better dap adhesion.
2. Cap your tip with a rigid disc (ex. a coin or fender washer), secure with strapping tape.
3. If you plan on adding a haft veneer, do so now. An optional layer of packing tape will help protect your vinyl from damage.
4. Cut strips of foam for your haft padding. Narrower strips will make a tighter spiral, wider strips a looser spiral. My preference is 3". Dap them end to end to make wrapping easier.
5. Working from the top of your handle towards the tip, start wrapping your strip of foam around the core. Overlap slightly (creating a corkscrew rather than a smooth cylinder) in order to minimize dead spots. Secure at the top and bottom with tape and trim any excess foam.
6. Cap the tip of your spear with a disc of foam.
7. Measure halfway down your haft padding and mark, prepare another strip of foam. Working from your mark and spiraling the opposite direction, attach your second layer of haft padding. Secure and trim.
8. Add a second cap of foam.
9. Cut a strip of foam 6" wide and long enough to wrap around your padding ((diameter+1)x3.5). Bevel one 6" edge to allow for a cleaner result, wrap around the tip of your padding, trim any excess.
10. Add a third cap of foam.
11. Cut a block of open-cell about 4" thick (layer if your open-cell is thinner) and an inch wider than the diameter of your tip. Cut off the corners to form an octagon. Glue your block to the tip of your spear, being careful to center it.
12. Cut a strip of foam 6" wide and long enough to wrap around the base of your head and bevel one edge. Placing the strip so 1-1.5" is on the open-cell and the rest is on the base, carefully wrap around the head, cinching and stabilizing the open-cell (a cross-section would look like a mushroom). This is referred to as a couching wrap. Trim any excess foam and secure with cloth tape.
13. Cover your head and haft.
14. Add a pommel. I recommend adding a small block of open-cell or some marine foam to the end, but this isn't necessary.
15. Enjoy!
